Hey crafty peeps! Have you checked out this month's featured papers yet? I love the versatility of the So Much Happy collection from Close to My Heart. I wanted to share a few of my projects using this paper line.
First, a graduation card for my sister. I used one of the Picture My Life Cards - So Much Happy (X7241E) and some of retired Glitter Gems for the water. I also added thin strips of the So Much Happy paper featuring candy apple and peach colors. The inside was stamped using a retired ConGRADulations stamp with my Intense Black Exclusive Ink (Z4189).
Next, I created a simple birthday card using papers from the So Much Happy papers. I love the combination of sapphire, mint, and lagoon colors.The lemon really pops on the flower paper in the background. I used one of the Picture my Life Cards for the sentiment. Don't be afraid to cut them up and use the parts you want! Inside I used a basic Happy Birthday stamp to finish this card off.
The last project I worked on was a Picture My Life spread using two Close to My Heart Pocket Plus Memory Protectors. I also busted out the Stamp of the Month - This Happened (S1903)for both the large "These are the moments I want to Remember" and the "Love This" stamps.
That's all I have for you today. I hope you enjoyed my few projects using the So Much Happy collection.
Create a Life You Love,
Amanda
Showing posts with label Crafturday. Show all posts
Showing posts with label Crafturday. Show all posts
Saturday, March 16, 2019
Monday, November 27, 2017
Make It Monday: Top Folding Card Base
Have you ever wanted to make a card, but didn’t have the perfect color base? Making card bases is simple and you can use the supplies you may already have.
Supplies Needed:
8 ½ x 11 inch cardstock
Ruler or trimmer with ruler
Scissors/trimmer
Scoreboard (optional)
1. If you have a larger piece of cardstock, cut it down to 8 ½ x 11 inches.
2. Cut the 8 ½ x 11 inch piece of cardstock in half on the 8 ½ inch side.
(You can cut the 11 inch side for a side folding card)
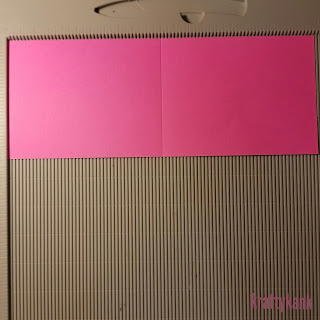
3. Score and/or fold your 4 ¼ x 11 piece of cardstock in half, from top to bottom, on the 11 inch side.
4. Decorate your card base. Tip: I add a piece of white to the inside of dark bases for my written statements.
Please let me know if you have any questions down below. I'd love to see your card base creations.
Links are directed to my website where I receive a small commission from purchases. I appreciate your business.
Monday, November 13, 2017
Make It Monday: 5 X 6½ Envelope
I know many of us make some amazing cards! Sometimes those cards don’t fit into the ready made 4½ x 5½ envelopes. After reviewing some others ideas online, I decided to post some instructions to create your own 5 x 6½ envelope. There is room for a larger card, multiple cards, or a card with lots of embellishments.
Supplies Needed:
10x12 piece of paper – (designer paper to match the card is super cute)
Score tool or Ruler
Scissors
Adhesive
1. If starting with a 12x12 piece of paper, trim to 10x12.
2. On the 12 inch side of your paper score at 3½ and 8 7/8.
3. On the 10 inch side, score at 1½ and 8½.
4. Trim off the corner tabs on all sides.
5. Round the corners on the small sections.
6. Fold along all score lines.
7. Adhere the large middle pieces together.
8. Adhere one of the small flap.
9. Only adhere the other small flap when ready to seal.
Please let me know if you have any questions. Have a great day!
Supplies Needed:
Score tool or Ruler
Scissors
Adhesive
1. If starting with a 12x12 piece of paper, trim to 10x12.
2. On the 12 inch side of your paper score at 3½ and 8 7/8.
3. On the 10 inch side, score at 1½ and 8½.
4. Trim off the corner tabs on all sides.
6. Fold along all score lines.
7. Adhere the large middle pieces together.
8. Adhere one of the small flap.
9. Only adhere the other small flap when ready to seal.
Please let me know if you have any questions. Have a great day!
Subscribe to:
Posts (Atom)


