Showing posts with label Wisdom-Wednesday. Show all posts

Wednesday, April 18, 2018

Wisdom Wednesday #1: Memory Keeping - Where to Start


Good morning to all of my crafty friends! I have decided to restructure my blog and my week. If you haven't noticed the change, I am sure you will now 😋. So from now on, I plan to do a Wisdom Wednesday post. This will include many different topics, from how to's, insight into design, and just a way to share my wisdom I have gathered in my crafting journey. I hope you play along and share your wisdom with all of us too. 


So for my very first Wisdom Wednesday, I want to start with Memory Keeping - Where to Start. I know many of you have been scrapbooking and memory keeping for years and may know all sorts of tips and tricks, but I also know there are those of you that have never preserved your memories and have no idea where to start. There are loads of products and options available, and these can be extremely over whelming, so let me give you a simple list of a few things to start.

  1. First and foremost, when deciding to begin your memory keeping journey, you need to find your why. Why are you wanting to keep these memories? Why do you take pictures in general? My why is because I want to preserve the memories with both photos and stories. I don't know about you, but my memory is pretty terrible. Having the scrapbooks full of memories allows me to hold onto those moments.
  2. Next, you need to begin sorting the memories. This can be a very daunting task, but it doesn't have to be. Start by sorting into larger categories such as year. Then break it down. I like to sort my photos by month and year. I know what months the events fall in, so it allows me to easily find what I am looking for.
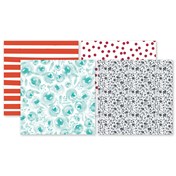
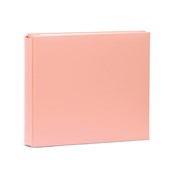
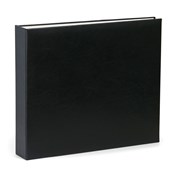
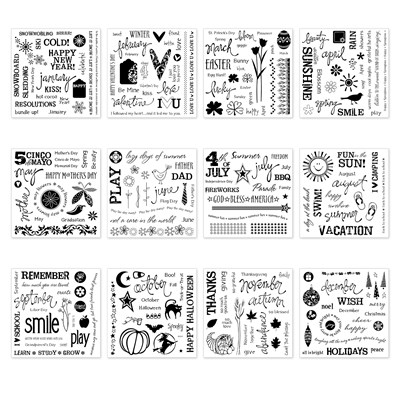
  3. Choose your format. There are many formats available these days. If you knew about the scrapbooking scene years ago, you may know the classic format. This includes photos and some extra photo matting with some different scissors for decoration. Scrapbooking has come a long way in the past 10 years and there are so many options available. You can use the Cut Above layout kits from CTMH that give full instructions and have everything ready for you to assemble. You can do Picture My Life scrapbooking. This is essentially choosing photos and cards and placing them in a slotted page protector. Personally this is my favorite as I can choose how detailed or simple I want to be. Another option is our Workshop Your Way kits. These also provide detailed instructions with cut measurements and extra embellishments that coordinate.
  4. Then, you need to make the time to do the memory keeping. So often we get into the routine of our days and forget about those things that make us happy. You need to schedule the time to do your hobbies and preserve your memories. This could be 20 minutes a day or an hour on Saturdays. Whatever time you allow, just make sure you are making it.
  5. Lastly, but certainly not least, HAVE FUN. Life is way too short to do anything not worth enjoying. Love the process, reminisce in the moments, and enjoy telling your story. 
If you would like further detail on any one of these steps, please let me know and I'd be happy to expand. Have a crafty rest of the week! 


Tuesday, August 22, 2017

Tip Tuesday – Using Cricut Cuttlebug

Happy Tip Tuesday! Here are 5 tips for using the Cricut Cuttlebug:

1. Use all types of manufacturer’s dyes or embossing folders including: Close to my Heart, Quickutz, Sizzix, and Spellbinders.
2. Extend the life of your plates by periodically flipping them over.
3. Don’t force items through the Cuttlebug, instead, check placement of your items.
4. Prevent paper cracking/ripping by rolling the plates through slowly.

5. Experiment with the placement and “sandwich” of your plates for each brand.

I am still new to my machine, do you have any tips?


Tuesday, August 15, 2017

Scrapbooking Supplies 101

So, you’ve decided to start scrapbooking or cardmaking. Welcome to the world of paper crafting! It might be overwhelming at first, but you don’t need to buy everything available to get started. Here are a few items I recommend when starting your scrapbooking and cardmaking stash.

  1. Paper
    • Cardstock – There are many options available for cardstock. Personally I like a thick card stock to use for card bases, background colors, frames, and more. The CTMH cardstock is my favorite, but I might be biased.
    • Pattern Paper – This isn’t a necessity, but pattern paper really makes your projects stand out. You can use pattern paper for embellishing, backgrounds, and decorative accents. There are a ton of options for pattern paper from CTMH that change frequently.
      product image
      product image
  1. Scissors/Paper Trimmer
    • Scissors – Scissors are a key tool for any paper crafter. You can always tear your paper, but I prefer a more finished look. My favorite scissors are the Non-Stick Micro-tip Scissors from CTMH. It gives me the sharpness I need and the fine tip allows for fussy cutting small shapes.
    • Paper Trimmer – This isn’t a necessity, but a paper trimmer will give you a straight cut that you might not be able to get with your scissors. At least I know I can’t cut a straight line (didn’t I learn that in elementary school)! https://kraftykank.closetomyheart.com/Retail/Product.aspx?ItemID=7190&ci=5984https://kraftykank.closetomyheart.com/Retail/Product.aspx?ItemID=10307&ci=9391
  1. Adhesive
    • Glue – You can use the old fashioned glue stick to adhere your photos and paper.
    • Tape Runner – I prefer a tape runner for my adhesive. It is much easier, cleaner, and doesn’t crinkle the paper. https://kraftykank.closetomyheart.com/Retail/Product.aspx?ItemID=9772&ci=7785
  1. Album
    • When all is said and done, you will want an album to put your scrapbooking pages in for you and others to enjoy viewing. CTMH has many album options including post and D-ring. Z5308https://kraftykank.closetomyheart.com/Retail/Product.aspx?ItemID=9437&ci=6731
  1. Embellishments/Stickers
    • Embellishments aren’t a necessity, but really bring your projects to life. CTMH offers embellishment kits as well as pre-determined kits for cards and scrapbook pages.


I hope this small list gets you started on your paper crafting journey. If you need any assistance or have any questions feel free to contact me. What are some of your must have items for beginners?


Tuesday, July 4, 2017

Stampaganza and Stamping Tips

It’s already July, meaning it’s time for Stampaganza! All month long, buy two stamp sets at full retail price (excludes Stamp of the Month), and get a third set FREE! CTMH even brought back some expired stamp sets for this awesome deal.

Don’t miss this awesome Word Puzzle Bundle (CC1300) for just $143.60, that’s almost a $72 savings!
Recommended My Acrylix® blocks: 
1" × 1" (Y1000), 1" × 3½" (Y1002), 2" × 2" (Y1003), 1" × 6½" (Y1005), 3" × 3" (Y1006), 2" × 3½" (Y1009), 2" × 6½" (Y1010)


Did You Know? 
  • You should season your stamps before using them? There are a few options including rubbing a pencil eraser across them, rubbing the stamp across the stamp pad and stamping until a clean impression appears, and using a StazOn ink to apply a coating on the stamp. 
  • Pick up your stamps using the block instead of applying it to the block with your hands to get a straight adhesion. However, if you want to curve your stamps you can do that too!
  • Acrylix® stamps allow you to see through to the paper, knowing exactly where you are stamping. You can even re-stamp to create a crisp image.
  • Don't be afraid to cut your stamps apart to rearrange words. I love stacking my phrases instead of leaving them in a line. 
  • Use the foam that comes with the stamp sets or another foam piece under the paper you are stamping to create a cleaner image. 
  • If your stamps don't stick to your My Acrylix® blocks any longer, wash them with soap and water. 

For more stamping tips head-on over to the CTMH blog. Post your stamping tips in the comments below!